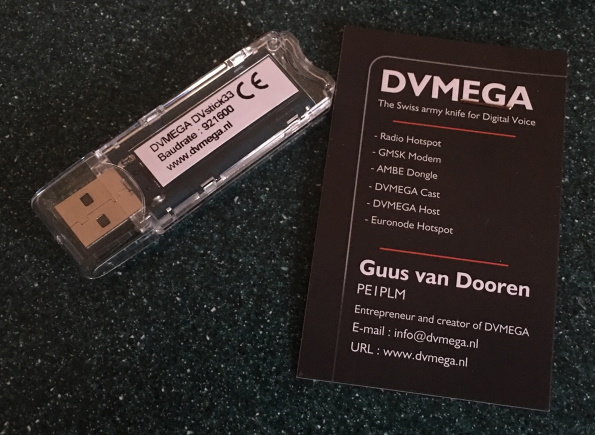
These directions should aid in building a complete, production-ready XLXD transcoding reflector using the XLX Multiprotocol Gateway software by Jean-Luc Deltombe LX3JL and Luc Engelmann LX1IQ on a Raspberry Pi.

Assumptions / Prerequisites
These directions assume:
- A good understanding of D-STAR and YSF
- How to use Linux reasonably well
- the use of the root user (via sudo -s)
- all source files will be stored in /root
- xlxd and ambed will both be installed to /xlxd
Installing the FTDI Drivers
The ambed process provided with the XLXD package, does not support the Debian-provided libftd1 package.
Download the driver package from FTDI here. All current Pis (as of 2020) are ARMv7 so download the “1.4.8 ARMv7 hard float” tarball. Save the file to your home directory (assuming /home/pi for these directions). Make a directory called libftdi2xx and cd into it. Then unpack the gzipped tarball. Even though the file is named just .gz, it is a gzipped tar file.
# mkdir libftdi2xx
# cd libftdi2xx
# tar xfz ~/libftd2xx-arm-v7-hf-1.4.8.gz
Only one file from the bundle is needed. Copy the file release/build/libftd2xx.so.1.4.8 to /usr/local/lib and then run ldconfig to make the library as available to the linker.
# cp release/build/libftd2xx.so.1.4.8 /usr/local/lib
# ldconfig
# ls -l /usr/local/lib/libftd*
lrwxrwxrwx 1 root staff     18 Jan 25 12:44 /usr/local/lib/libftd2xx.so -> libftd2xx.so.1.4.8
-rwxr-xr-x 1 root staff 226692 Jan 25 12:42 /usr/local/lib/libftd2xx.so.1.4.8
So ends the installation of the FTDI library
Installing XLXD
The best way to install XLXD on a Pi is using N5AMD’s installation script. Install git on your Pi using ‘apt install git -y’. Then make a directory named xlx-installer, change to it, and download and execute the installer script.
# mkdir reflector-install-files
# cd reflector-install-files/
# git clone https://github.com/n5amd/xlxd-debian-installer
# cd xlxd-debian-installer/
# ./xlxd-debian-installer
After the installation is complete, a minimally configured D-STAR reflector and a working dashboard should be available on the system. At this point, test the basic functionality of xlxd to make sure everything is working before proceed.
Customizing XLXD for YSF Transcoding
The xlxd process does not have a configuration file and most options are defined pre-compile within the main.h file in the sourcecode. The files in this section are in reflector-install-files/xlxd/xlxd/src. To setup for transcoding, edit main.h and make the following changes.
Carefully consider how many modules you want to make available in the system. The default is 10 and the max is 26 (also defined as NB_MODULES_MAX). There’s no theoretical reason you can’t use 26 but if you are adding in transcoding capabilities, there is no restriction on which module(s) can transcode. So it’s possible to theoretically oversubscribe on the transcoding chip. Currently XLX330 is running with all 26 modules but that’s mostly “because we can” not because of any design decision. Change the number of modules as follows:
// reflector ---------------------------------------------------
//#define NB_OF_MODULES                 10
#define NB_OF_MODULES                   NB_MODULES_MAX
By default, xlxd operates as a full WIRES-X server. That’s a very cool feature, but that’s not likely the desired setup so change the configuration so that clients joining with C4FM/YSF auto-link to the module you are transcoding on. This example auto-joins module A:
#define YSF_AUTOLINK_ENABLE  1  // 1 = enable, 0 = disable auto-link
#define YSF_AUTOLINK_MODULE  'A' // module for client to auto-link to
Save and exit from main.h. This will build the proper YSF Gateway support.
The next change is for a better, customized message to show up in the ysfreflector.de directory. It is NOT necessary to make this change and this change has to be made very precisely or your xlxd process will not work right. If you don’t want to make this change, skip down to rebuilding the software.
Edit the file cysfprotocol.cpp. On or near line 951 is an array like this:
uint8 description[] = { 'X','L','X',' ','r','e','f','l','e','c','t','o','r',' ' };
The description[] array must contain precisely 14 letters, numbers, or spaces – no more and no less. If your description is less than 14 letters, all trailing characters must be spaces. Change this array to whatever you want the description to be in register.ysfreflector.de’s database. As an example, The Megalink XLX330 reflector is set to “Megalink Netwk”. The code example is:
uint8 description[] = { 'M','e','g','a','l','i','n','k',' ','N','e','t','w','k'};
After editing the array and triple-checking it’s correct, save the file and exit.
Now rebuild the xlxd binary. From the same “src” directory clean out the old build with ‘make clean’ and then re-run the build with ‘make’. Once the process has been completed, copy the new xlxd into place and restart the service.
# make clean
# make
# cp xlxd /xlxd/xlxd
# systemctl restart xlxd
Now re-test xlxd with D-STAR and with YSF to make sure everything is working properly. The protocols will not yet transcode, but each should work separately.
Building and Installing AMBED
Return to the reflector-install-files/xlx/xlxd installation files and change directory to the ambed subdirectory of the xlxd distribution. Then run make to build the ambed program.
# cd ~/xlx-install/xlxd/xlxd/ambed
# make
The ambed daemon will build. If you get an error about libftd2xx not found, make sure “Installing the FTDI Drivers” above was properly followed. When the compilation is complete, copy the file ambed (just compiled) to the /xlxd directory.
# cp ambed /xlxd
# chmod 755 /xlxd/ambed
Instead of using the ‘run’ script that comes with the xlxd to control the process (which doesn’t really control anything), use a systemd service script. Copy the following into the file /lib/systemd/system/ambed.service:
[Unit]
 Description=AMBE Transcoder Daemon
 After=network.target
 [Service]
 Type=simple
 User=root
 Group=root
 ExecStart=/xlxd/ambed 127.0.0.1
 Restart=on-abnormal
 [Install]
 WantedBy=multi-user.target
Then enable and start the service.
# systemctl enable ambed
# systemctl start ambed
# ps auxw | grep ambed
Now test your systems in a transcoding fashion!


